


Teams and Workspaces: Organize and Share SOPs at Scale

SOPX now supports teams, workspaces, and granular sharing. Organize SOPs by department or project and control exactly who sees what, using your org role and each share's access level.
TL;DR
SOPX organizes SOPs with teams, workspaces, and granular sharing, built on two ideas: your org role (what you are on the team) and a share’s access level (what it lets you do). Shared workspaces give the whole team the right access automatically by role. Restricted workspaces scope procedures to specific people. There is no private toggle: a procedure is shared the moment you connect it to a person, workspace, or public link.
- Two ideas explain every permission: your org role (Owner, Admin, Creator, Member) and the access level a share unlocks (view, comment, edit, manage). Highest access wins.
- Shared workspaces grant access to everyone in the organization automatically, based on their role, so there is no list to maintain.
- Restricted workspaces are for anything only specific people should see; roles grant nothing and you add the exact people and teams.
- No make-private switch: add a person, put it in a workspace, or turn on a public link, and the procedure is shared. Remove all three and it goes back to private on its own.
- Public links open a read-only, no-login page for anyone with the link, shareable as a QR code.
The problem: SOPs grow, structure doesn’t
Most teams start with a handful of procedures. At that stage, a simple list works fine. Everyone sees everything, and that’s okay because “everything” is ten SOPs.
Then the library grows. Production has their SOPs. Quality has theirs. Maintenance documents their own procedures. The warehouse team has a separate set. IT has onboarding workflows. And suddenly, everyone is scrolling through procedures that have nothing to do with their job.
Without structure, three things happen:
- People can’t find what they need. A production operator searching through 150 SOPs to find the one relevant to their machine wastes time and loses patience.
- Sensitive procedures are visible to everyone. Not every SOP should be accessible to every employee. Compliance procedures, HR workflows, or client-specific processes may need restricted access.
- Sharing becomes all-or-nothing. Either someone has access to everything, or they have access to nothing. There’s no middle ground.
This is not a problem with documentation. It is a problem with organization.
Two words that explain every permission
Before the how-to, learn these two terms. Keeping them apart clears up almost all confusion about who can do what.
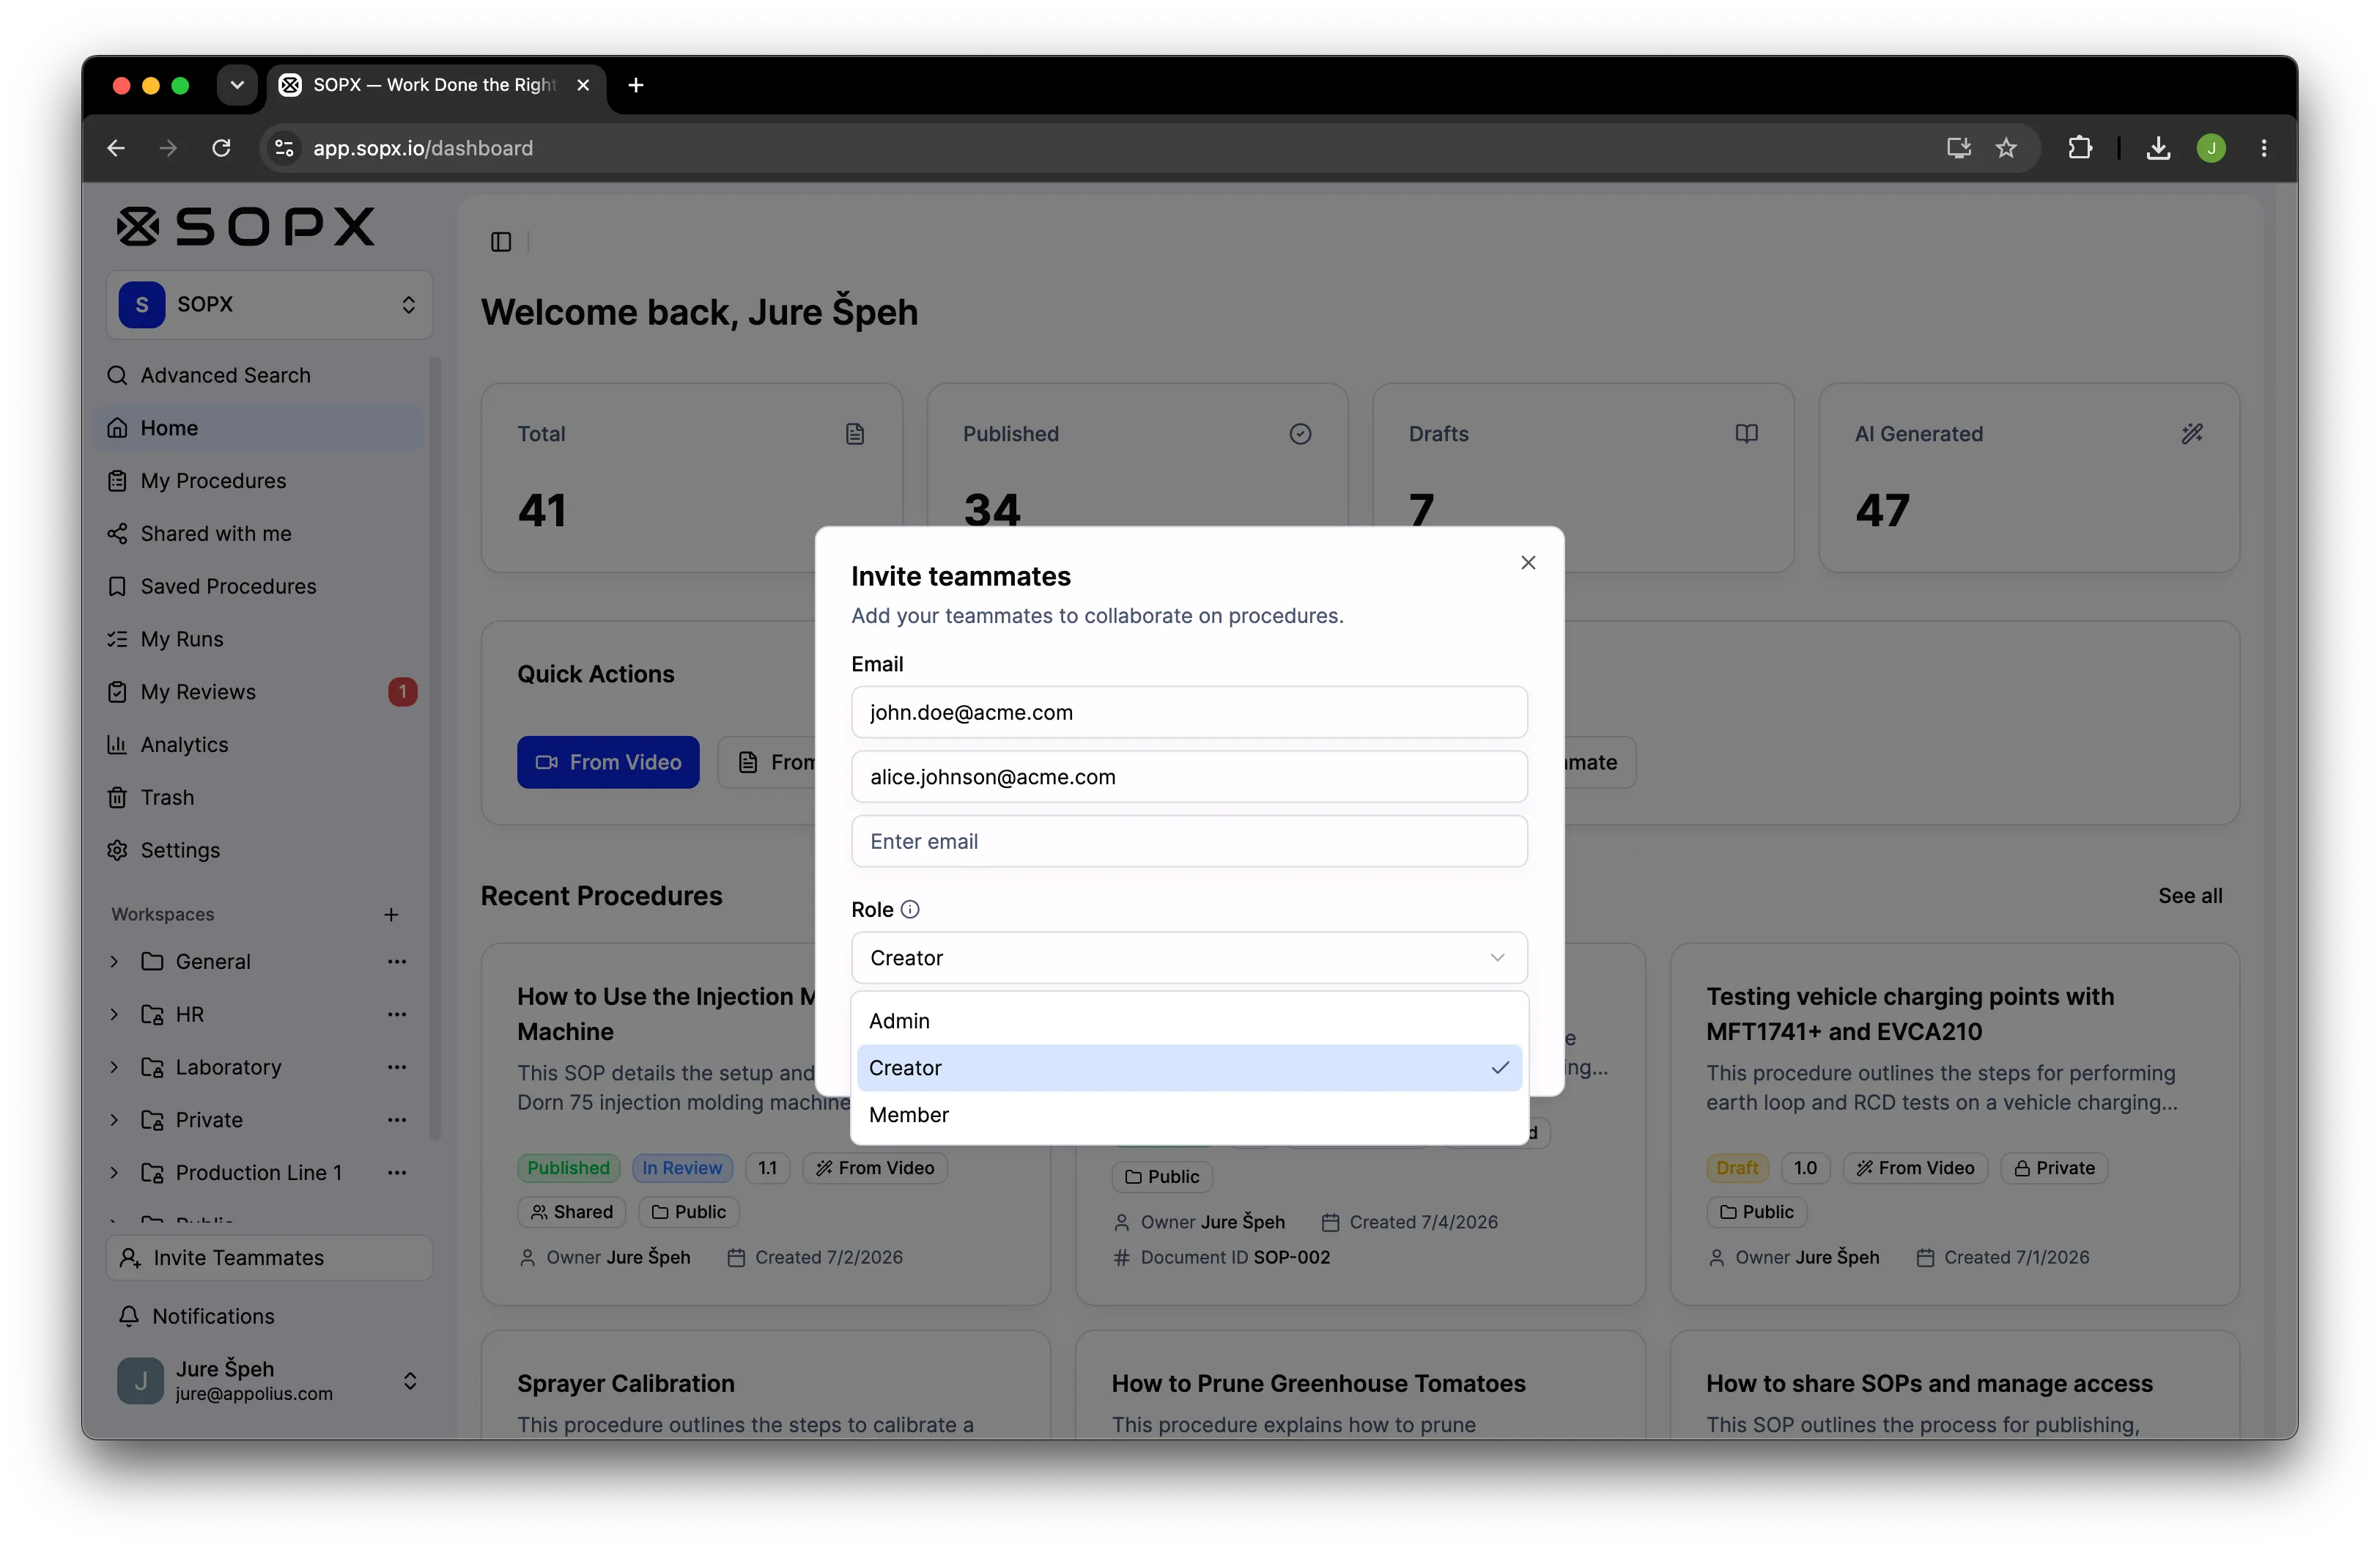
1. Your organization role, which is what you are on the team. It’s set once per person.
| Role | Can do |
|---|---|
| Owner | Everything, including billing and organization settings. |
| Admin | Manage people, teams, and every workspace, and see org-wide analytics. |
| Creator | Create new procedures, from scratch or from a video with AI. |
| Member | Use and edit the procedures they’re given, but can’t create new ones. |
2. The access level, which is what a share lets you do on one procedure or workspace. It’s a simple ladder:
Can view → Can comment → Can edit → Can manage
- Can view reads the published procedure.
- Can comment reads it and leaves comments.
- Can edit changes content, submits for review, and sees unpublished drafts.
- Can manage does everything, including sharing and settings.
One rule to remember: highest access wins. If two things grant different levels, you get the higher one.
What we built
SOPX supports three layers of organization and access control: teams, workspaces, and granular SOP sharing.
Teams
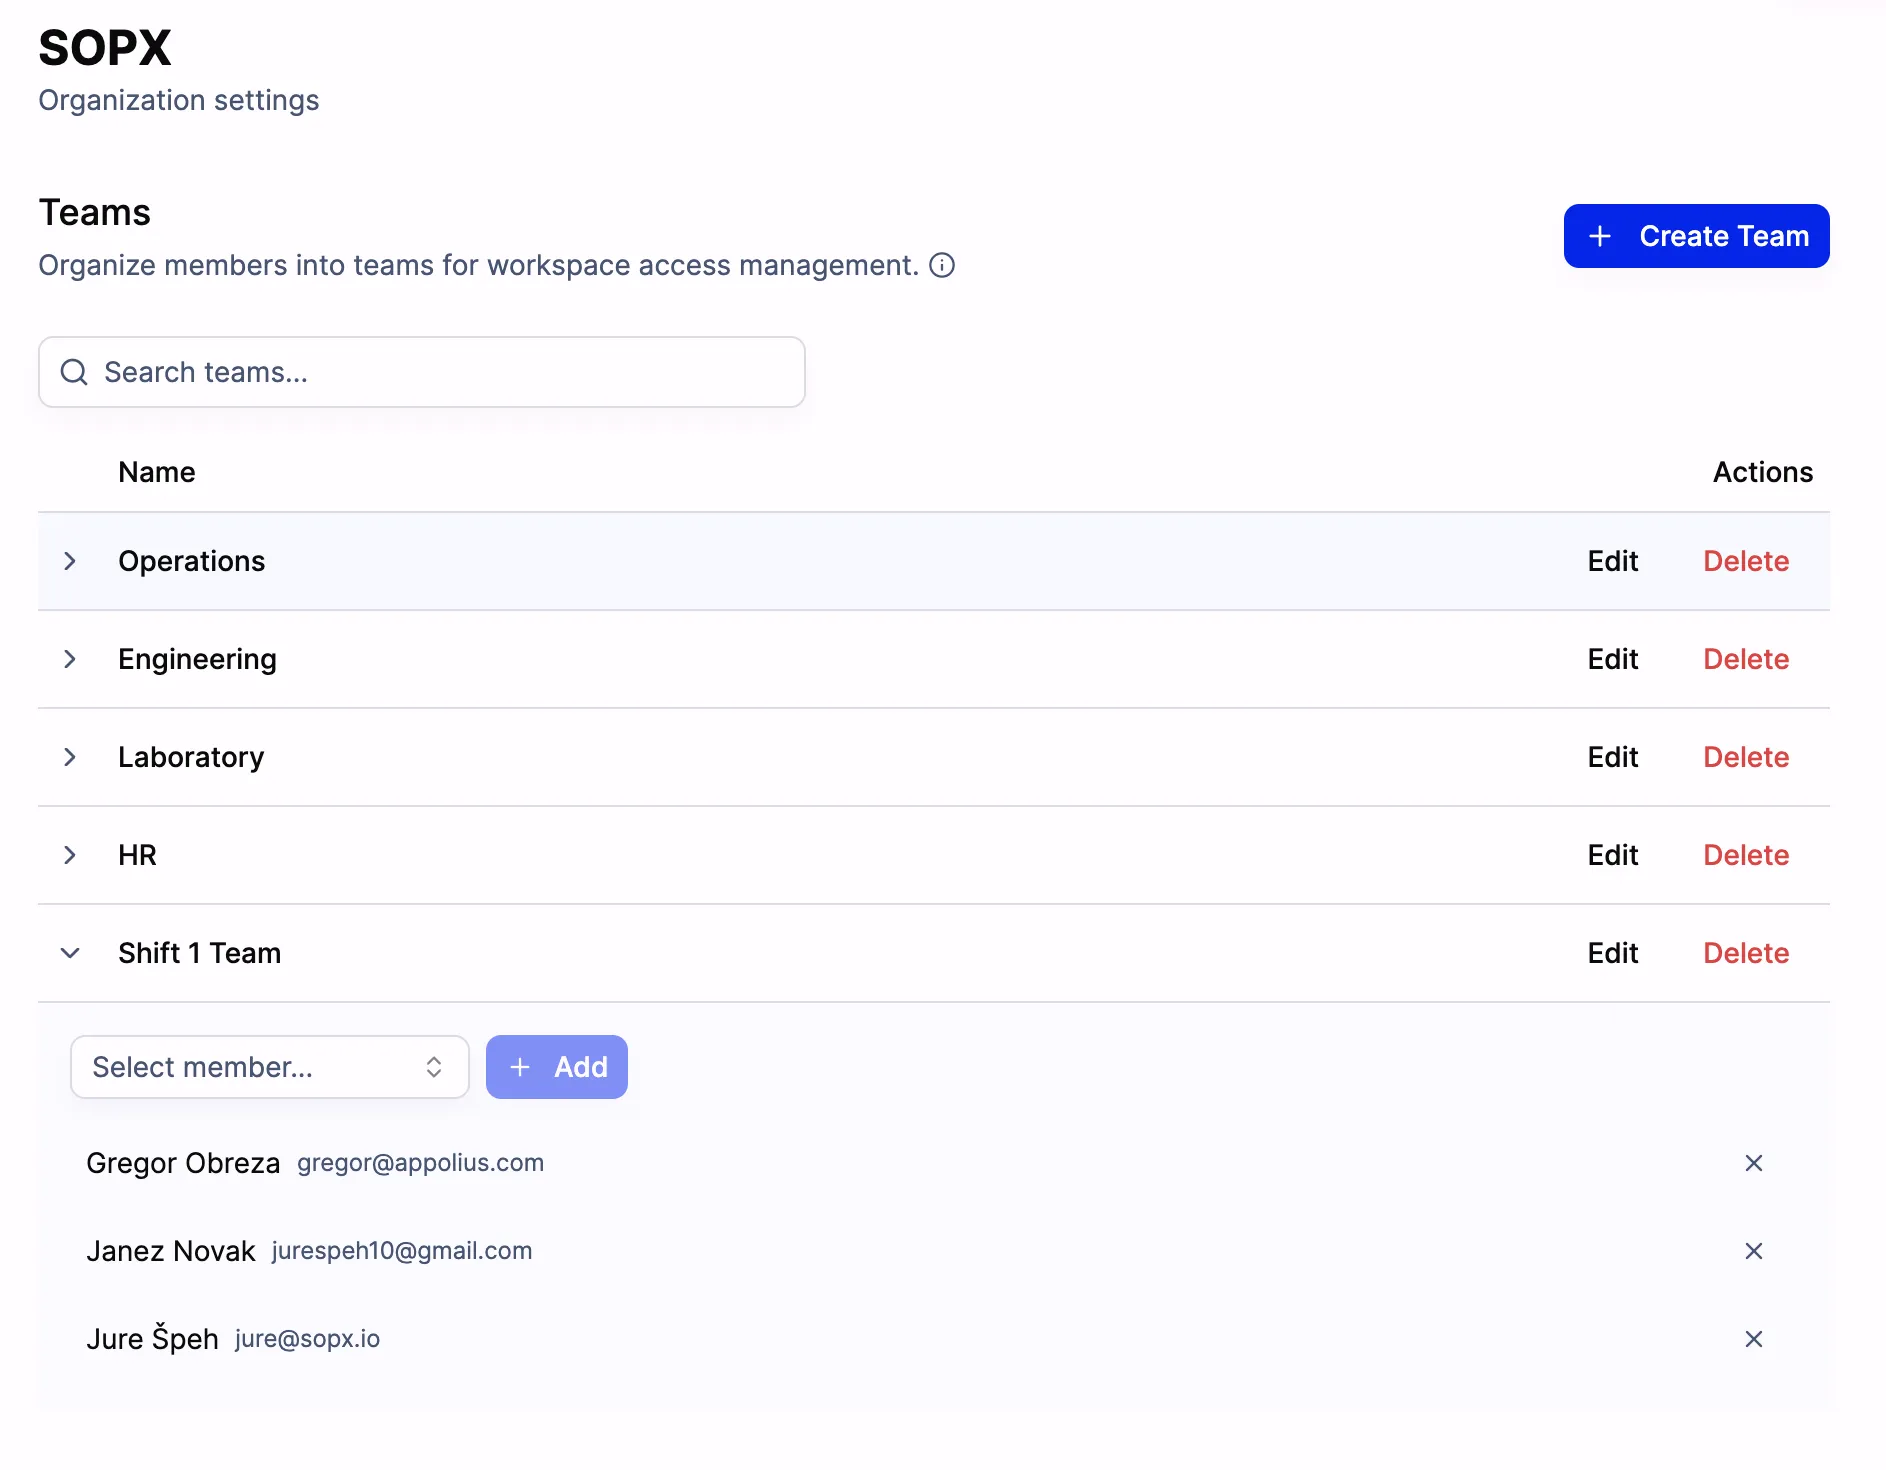
Teams are groups of users within your SOPX organization. You create a team, add members, and then give that team access to specific workspaces or individual SOPs.
Think of teams as reflecting how your company is already organized: production, quality, maintenance, HR, onboarding. Instead of managing access person by person, you manage it by group.
Example: You create a “Production Floor” team with 12 operators and a shift lead. When you create a workspace for machine changeover procedures, you grant the team access once. All 13 people can see every SOP inside. When a new operator joins, you add them to the team and they immediately inherit access to everything the team can see.
Workspaces: Shared or Restricted
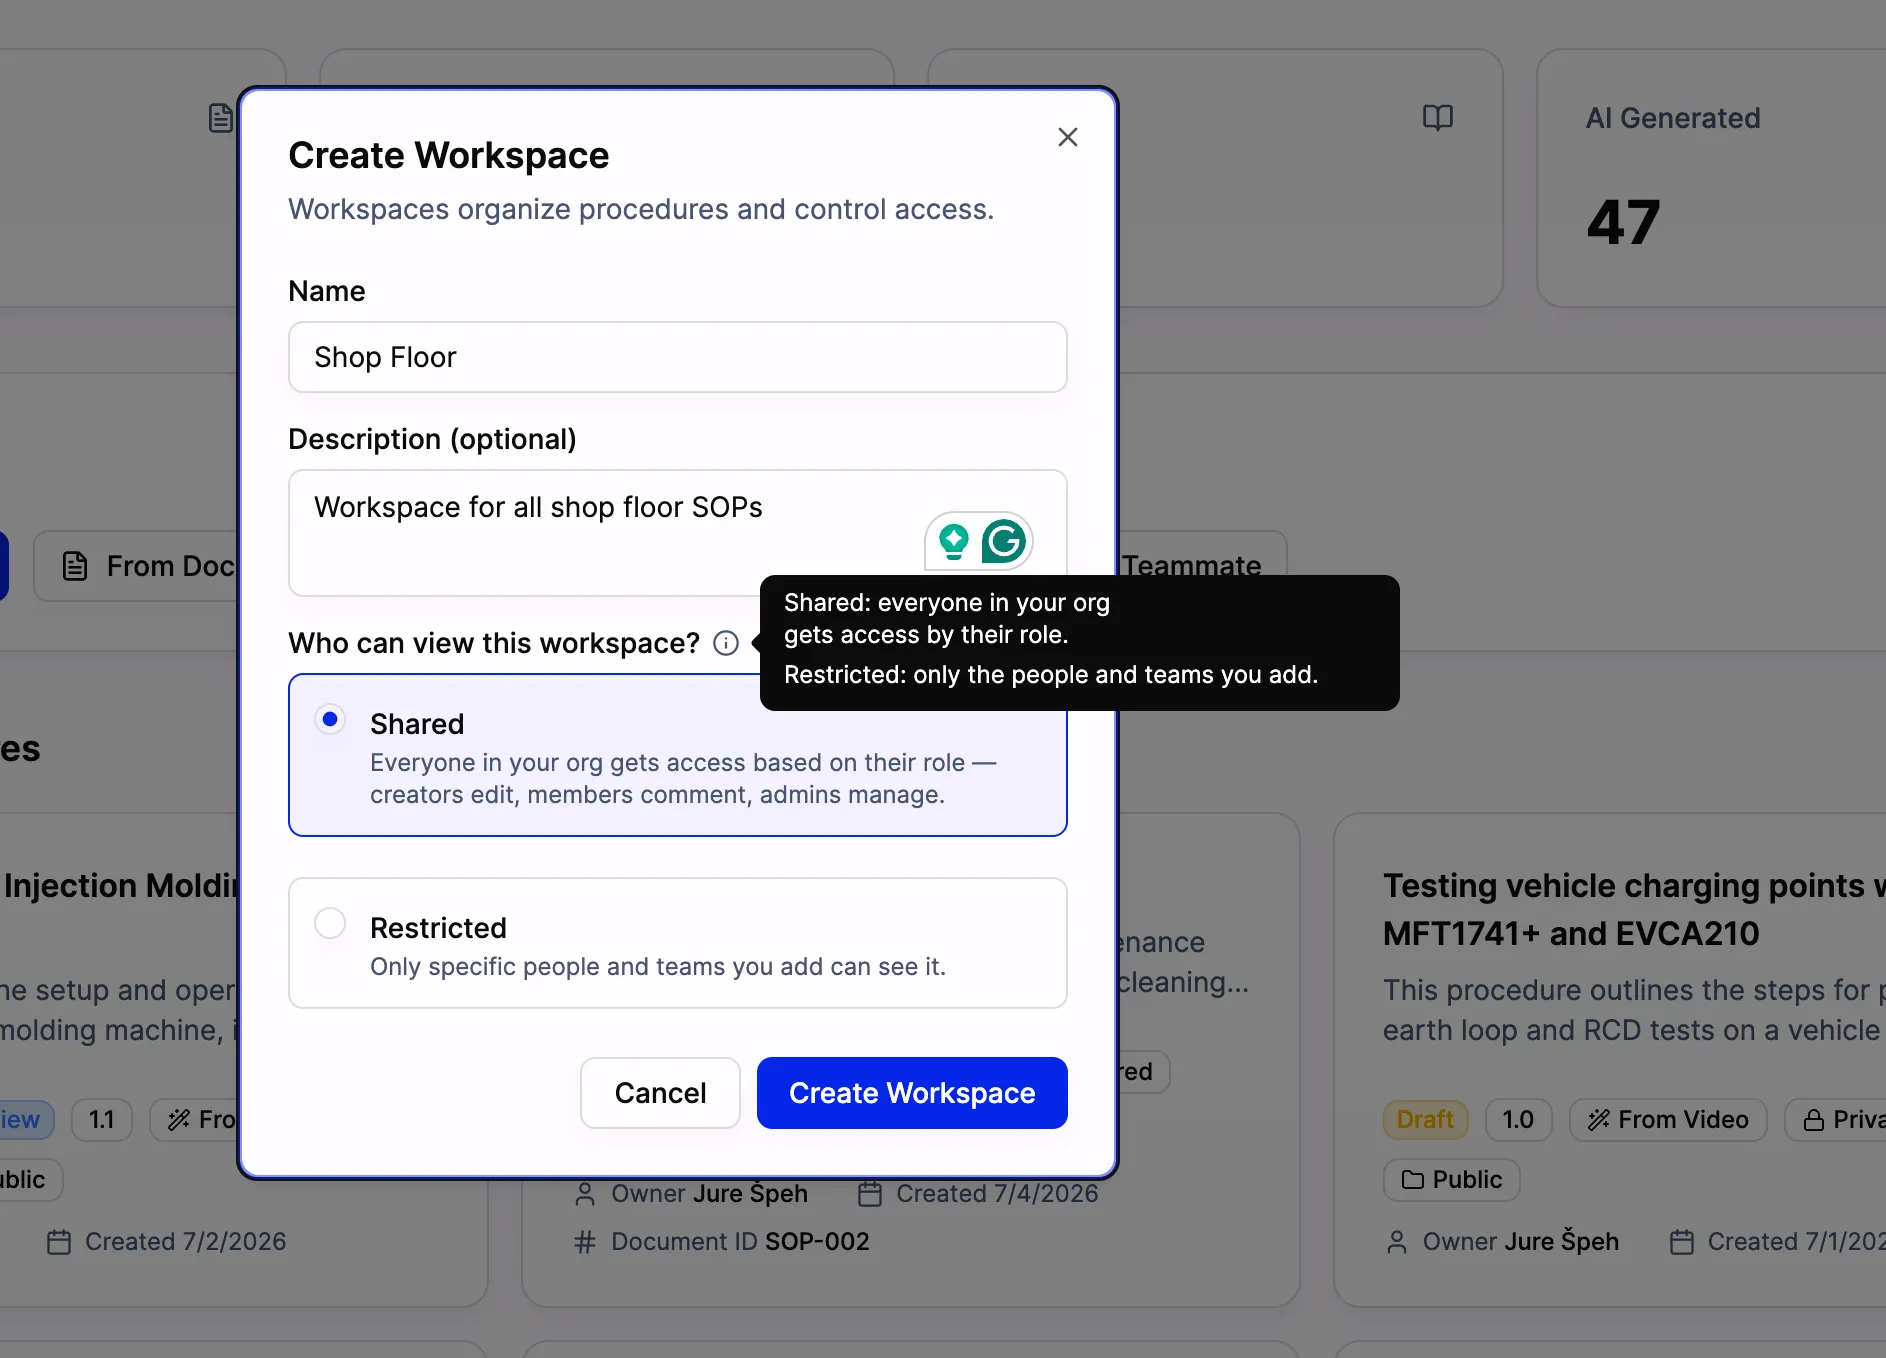
Workspaces are containers for organizing SOPs. Every workspace has one of two modes, and you pick it when you create it.
Shared is for anything the team should have by default. Everyone in your organization gets access automatically, based on their role, with nothing to grant person by person:
| Org role | Access in a Shared workspace |
|---|---|
| Owner / Admin | Can manage |
| Creator | Can edit |
| Member | Can comment |
So you create a Shared workspace and immediately creators can build and edit in it, members can read and comment, and admins can manage. Change someone’s role later and their access updates on its own.
Restricted is for anything only specific people should see. Roles grant nothing here; you add the exact people and teams who get in (owners and admins can always manage).
Two things to know when you use Shared workspaces:
- You can lift someone up, not push them down. Grant a particular member “Can edit” and they get it. But you can’t drop someone below their role’s automatic level in a Shared workspace. If you need to keep specific people out, use a Restricted workspace instead.
- There’s nothing to maintain. Access is worked out live from each person’s role, so there’s no list to keep in sync.
Example: A food production company creates a Restricted “HACCP Procedures” workspace for the quality team, a Restricted “Machine Maintenance” workspace for the maintenance team, and a Shared “General Safety” workspace everyone can reach. The maintenance team sees their workspace and the shared safety one. The quality manager sees HACCP.
Sharing one procedure: add a person, a workspace, or a link
Here’s the part that surprises people: there is no “make private / make shared” switch to flip. A procedure becomes shared the moment you connect it to anyone, in any of three ways:
- Add a person or team in the Share window.
- Put it in a workspace, by moving it there or creating it inside one.
- Turn on a public link.
Do any one of those and it’s shared, and the amber “private” banner disappears on its own. Remove all three (no people, no workspace, no link) and it goes back to private by itself. You just share the way you want, and the state keeps itself correct.
That’s why new procedures start private: when you create one, it’s yours alone, so you can draft, edit, and refine before anyone else sees it. It becomes shared the first time you connect it to someone.
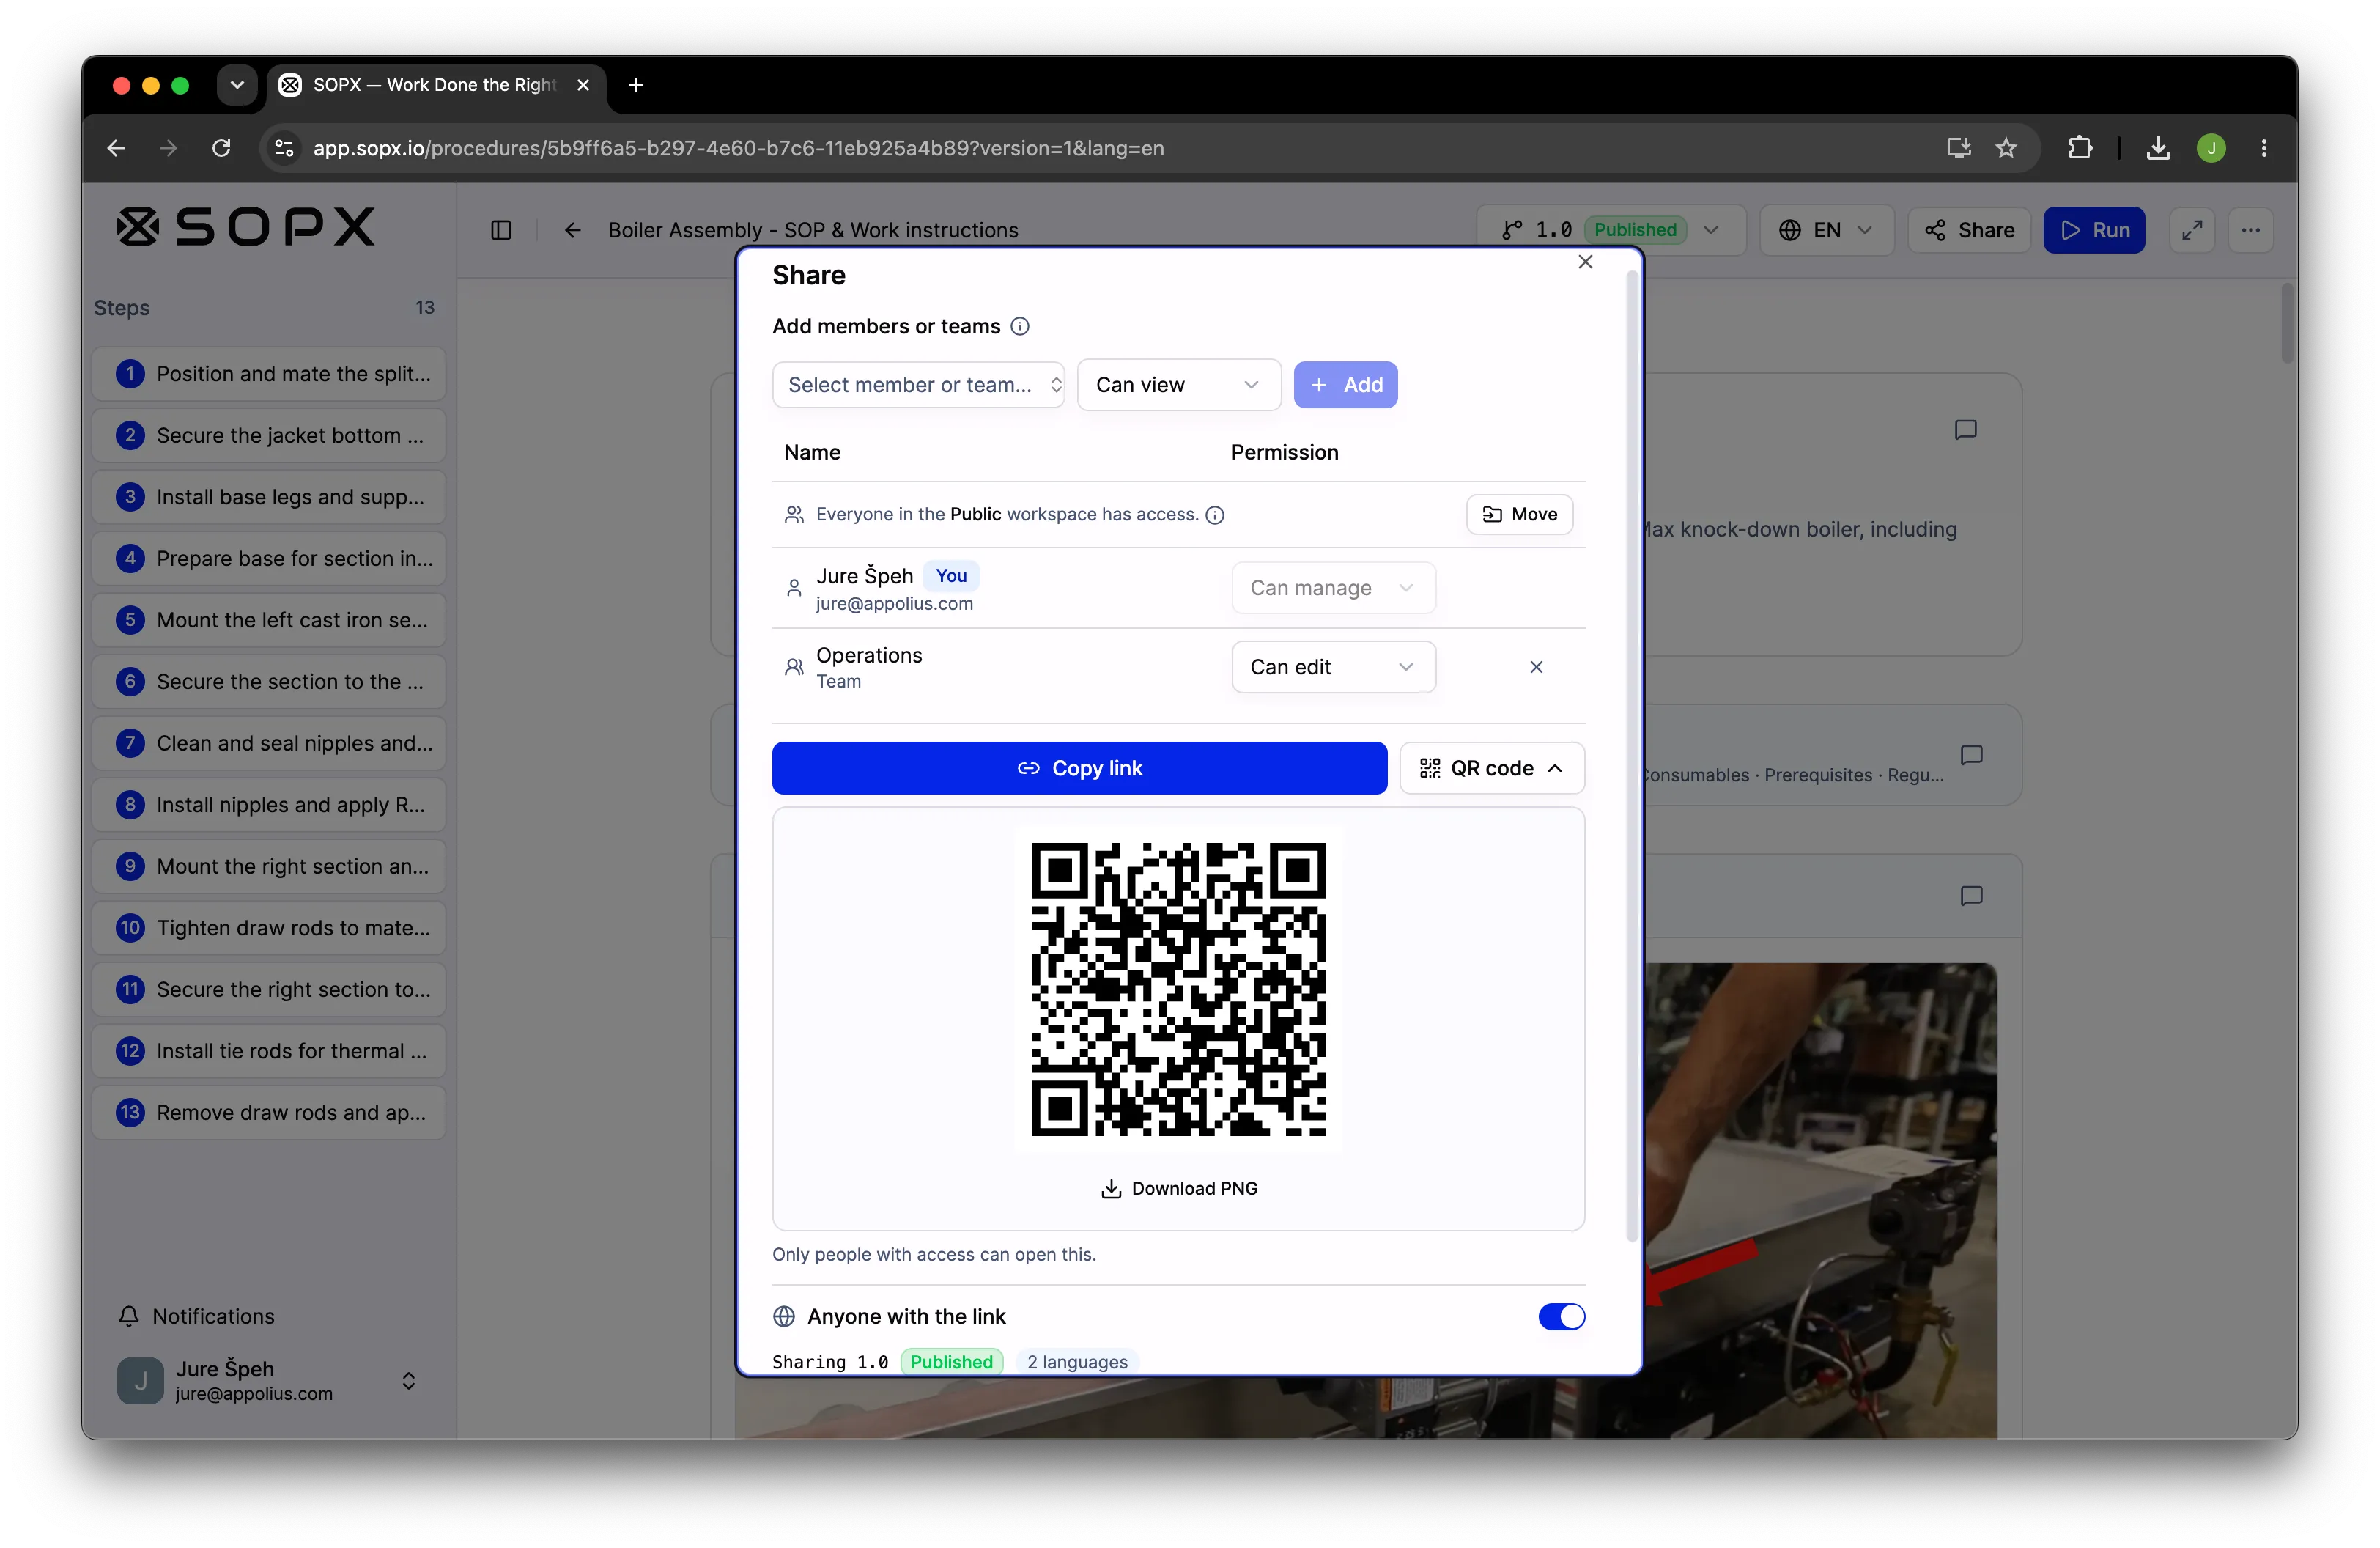
The Share window
Click Share in the procedure header. One window handles everything:
- People with access. A You row shows your own level, and for non-owners an Owner row shows who to ask. Below that are the people and teams you’ve added, each with a dropdown (Can view / comment / edit / manage) and a remove button. Adding the first person shares the procedure; removing the last one can return it to private. If the procedure sits in a workspace, a line reminds you that everyone in that workspace already has access, with a quick Move button.
- Procedure link. A Copy link button and a QR code, for people who already have access.
- Anyone with the link. A public-link switch. Turn it on (managers only, after a quick confirm) to publish a read-only, no-login page at a public web address, with Copy public link, a QR code, and a Preview.
The Move window
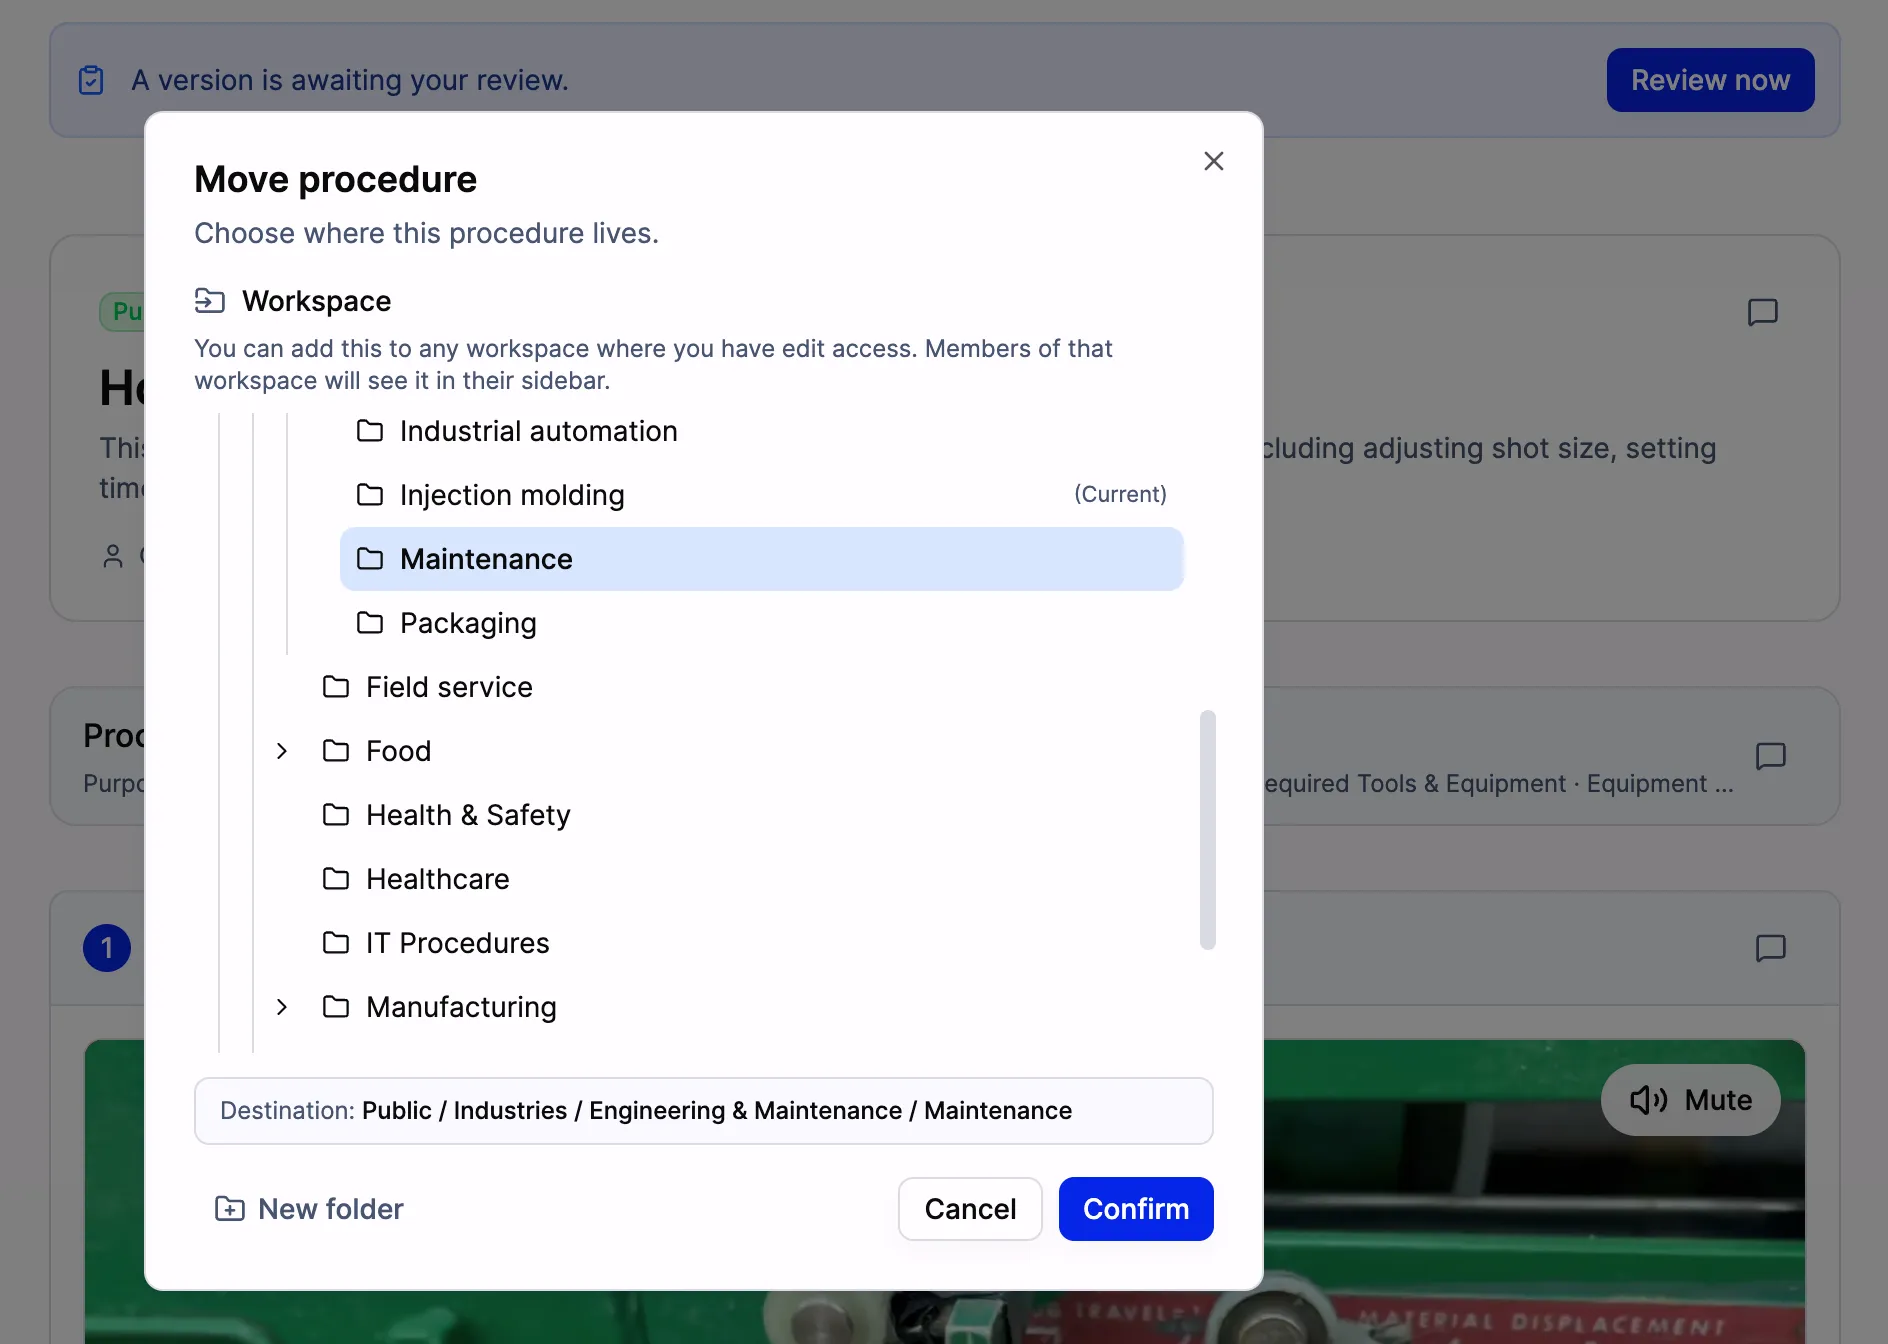
Open Move from the procedure’s ⋯ menu, or the “Add to workspace” button on a private procedure. It shows a folder tree just like the sidebar:
- Pick a workspace or folder to set the procedure’s home; your current spot shows (Current).
- Pick No workspace at the top to remove it from any workspace.
- Restricted workspaces show a locked-folder icon, Shared ones a normal folder.
- Workspaces you can’t edit are greyed out with the reason, so you’re never left guessing.
- Nothing changes until you hit Confirm. If a move would cut off people who currently have access (moving into a Restricted workspace), you get an “Access will be removed” warning listing exactly who.
A quick rule of thumb: moving to a different workspace can change who sees the procedure, so it needs manage rights on it. Rearranging folders inside the same workspace doesn’t change visibility, so it only needs edit rights on that workspace.
Sharing individual SOPs across workspaces
Every SOP has a home workspace, but you can also share an individual SOP with specific teams or people outside that workspace. This is useful when someone needs one procedure without access to the whole workspace.
Members who receive individual access to an SOP (without workspace access) find it in their “Shared with me” area. There’s no need to add them to a workspace just for one procedure.
Because highest access wins, overlapping grants resolve cleanly:
- The person who created the procedure always keeps full access, regardless of workspace or sharing settings.
- Direct SOP-level access stacks with workspace access, and the higher level applies. If Maria can only comment in the “Production” workspace but you share one SOP with her as an editor, she can edit that SOP while still only commenting on the rest.
- When someone has both team and individual access, the higher one wins. If Tom is a commenter through the “Maintenance” team but you also share the SOP with him individually as an editor, he gets editor access.
- Workspace managers get full access to everything inside, even procedures they didn’t create.
How this works in practice
Here are the patterns we see teams adopt:
By department
Create a workspace per department: Production, Quality, Maintenance, Logistics, HR. Make the sensitive ones Restricted and grant the corresponding team access. Cross-functional procedures like safety go into a Shared workspace, where everyone gets the right access by role automatically.
By location or site
Multi-site operations create Restricted workspaces per facility. Site-specific SOPs stay in the site workspace. SOPs that apply everywhere go into a Shared workspace.
By external audience
Turn on a public link for the contractor onboarding procedures and share the individual SOP links with every new contractor before they arrive on site. They open it on their phone, review the procedure, and show up prepared. No account, no app, no friction.
By client or project
Service companies and consultancies create a Restricted workspace per client and document each engagement separately. When a client needs to see a procedure, share that individual SOP externally via public link.
Why this matters as you scale
When your team is five people with 20 SOPs, organization doesn’t matter much. When your team is 50 people across three departments with 200 SOPs, it matters a lot.
Without structure:
- New employees don’t know which SOPs are relevant to them
- Supervisors can’t quickly find the procedures their team needs
- Sensitive procedures are visible to people who shouldn’t see them
- Sharing with external people means sharing everything or nothing
With teams and workspaces:
- Every user sees exactly the SOPs relevant to their role
- New team members inherit the right access automatically
- Shared workspaces handle company-wide procedures, Restricted ones lock down the rest
- Public links let you share specific SOPs externally without exposing your entire library
- New procedures start private, so you can draft in peace before sharing
- You can reorganize as your company grows without starting over
Good to know
- You share with existing members and teams. Inviting someone who isn’t in your organization yet, by email from the Share window, is coming later.
- Viewers and commenters see only published versions. If a procedure hasn’t been published yet, people with view or comment access won’t see it until it is (the Share window warns you).
- Owners and admins can always manage any procedure or workspace. That’s the safety net.
Getting started
If you already have SOPs in SOPX, you can start organizing them today:
- Create workspaces for your main organizational units (departments, sites, or projects) and set each to Shared or Restricted.
- Create teams that match your company structure.
- Move existing SOPs into the relevant workspaces.
- Grant team access to each Restricted workspace with the right level (view, comment, edit, or manage). Shared workspaces already grant access by role.
- Turn on public links where external sharing is needed and share individual SOP links with contractors, partners, or auditors.
This takes minutes to set up, and the payoff is immediate: less clutter, clearer access, and easier sharing.
Teams and workspaces are available now on all SOPX plans. Sign up or log in to get started.